Thursday 27 October 2016

Creative Drawing - Collaging

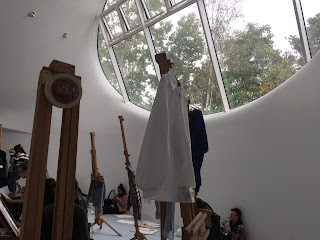
This was our last day with one of our lecturers (sad face) but it was also an enjoyable day as we collaged all day using editorials. Collaging is one of my favourite things to do as my artwork tends to be quite messy which links quite well with collaging. Our group were also in the most amazing drawing studio which my friends get jealous of.


Collaging with these editorials was really enjoyable as you could absolutely anything with the pictures, which is what I tried to do. I tried to base my theme on celebrity endorsement which relates to my publication. I learnt many different ways of collaging and approaching this task quite quickly.


When I got home, I decided to try collaging using photoshop with my own work too. This was extremely fun as I could be as messy and creative as I wanted to be. I used a variety of layers, scribbles, paint brushes, and patterns from the internet. 


Tuesday 25 October 2016

Creative Drawing - Introduction to InDesign


 Today, we got taught how to use inDesign as we are using this program to create a publication in. I've had previous experience with this program but i'm not an expert so this session helped me a lot. 

To start with, we got taught all of the main tools that are shown in this program. Once we got the hang of it, we created a 'national geographic' front cover so we could get use to the basic tools that we will need. 


This session has helped me a lot as I now know why you have to 'place' an image rather than copy and paste it, and how to export the file properly. This will help me with this publication when i'm doing it independently and for my digital fashion unit. 


Thursday 20 October 2016

Creative Drawing - Poole Museum workshop

Rachel Lillie illustration workshop


Our class took a second trip to Poole Museum to attend a workshop with an illustrator, Rachel Lillie; who takes inspiration from her surroundings and story telling of real life events. The workshop itself was very enjoyable but also very challenging as illustration work like hers isn't my strongest point.


As soon as we got there, she talked us through her work and gave us a lot of information on her style of working. We then took a look around the lines of thought gallery and at some of the work that inspired her. She explained why and how they completed that piece of work as well as telling us to remember the work as we were aiming to draw in a similar way to them and Rachel herself.


After this was done, we were set four 15 minute drawing tasks taking inspiration around us aswell as story telling; just like Rachel herself and the artists that inspire her. The way we had to draw so quickly was challenging but quite inspiring as i'm not use to drawing that quickly.


My favourite part of this session was the story telling part, where we created a story from the observational drawings we completed. It was a fun task as you could think of something as bizarre and strange as you wanted. The more strange it was, the better it was! It was a really different way of working for me as I don't tend to draw scenes or create stories, so it was nice being to engage with Rachel's style of working and try out a different approach.

The day was very enjoyable and inspiring as it has enabled me to bring new ideas into my fashion illustration work.


Tuesday 18 October 2016

Creative Drawing - Adobe Illustrator - Part 2

PART 2 -

This was the second part of the adobe lesson where we explored the Adobe illustrator software further, but this time we learnt how to actually create garments.

We scanned in our garments we drew in the technical flat's drawing lesson a couple of weeks ago, so we could have a rough outline and a starting point. Then, we just explored with the program by using lines, and curving the lines to create the shape of the garment.


This task was really fun as it's always been something I've always wanted to explore and have always wondered how fashion designers do their illustrations. This is beneficial for me when designing garments and putting together outfits. I prefer this way of working rather than drawing them out by hand as this way allows me to quickly erase any errors I have made and allows me to draw accurately.

(In the process)

Our garments didn't look as professional when just drawing circles for the buttons or lines for the zip, so we were taught how to draw buttons and zips in an easy way. We used the same techniques that we learnt in the first lesson (using the align toolbar), which was great fun as I felt like a professional at using that toolbar!

Thursday 13 October 2016

Creative Drawing - Draped fabrics

Drawing draped fabrics is extremely difficult and has been something i've always struggled with, and after this session, I still can't get to grips with it, even after four and half hours of practising. However, drawing in Passiv Haus always makes things better with how beautiful it actually is for a drawing studio.

Passiv Haus
The draping, creases and fold of fabrics is by the far the hardest thing to draw, especially if the fabric has a pattern as it looks like an optical illusion. One of the fabrics I drew did exactly that as it was striped and the stripes seemed to be going here, there and everywhere! Every time I went to draw a line, I lost it after I would glance at my paper, which was a massive pain. The aim was to get use to drawing different fabrics and drawing their shadows with a variety of medias.


My most effective pieces were the quick sketches I completed, by doing a blind and a continuous line drawing, as the lines are quick and get the basic shape of the garment. Using mixed media within a piece helps the shape and lines come to life a little bit more.


 Doing this task has enabled me to understand the fabrics shadows and shape and understand that each fabric drapes differently depending on the thickness of the material. Drawing draped fabric will always be my weakness, but i'm glad i've spent time analysing a variety of fabrics further which will help me with my work in my other two units.

Tuesday 11 October 2016

Creative Drawing - Adobe Illustrator - Part 1

PART 1 -

Adobe software is something i'm quite familiar with as I have had experience with a couple of the programs, Photoshop and In Design, previously during A Levels. However, we were learning how to use Illustrator which i'm not at all familiar with. This workshop was only a couple of hours long which meant we only learnt how to do the basics.

We were looking at the pathfinder tool (unite/add, minus front/subtract, intersect, exclude) as this is very important when drawing garments.


Then we eventually started drawing and making shapes so we could test the pathfinder tools with a shape. This was fun but also quite challenging! 


In our next lesson we are going to be drawing our own garments using this toolbar and learn about more of the tools. 

Thursday 6 October 2016

Creative Drawing - Technical flats

Thursday's are drawing days, tiring but enjoyable. We were back in Passiv Haus (the really cool drawing studio that amazes me everytime) but this time we were drawing technical flats of our own garments so we can get use to drawing them by hand and get use to the shapes of them. I've never had a go at drawing these technical flats before so this was something completely new to me which I enjoyed a lot.
Passiv Haus
Each of us brought in two garments of any kind and we all drew our own garments as well as each others. We had them on hangers or draping over the easels so we could get a full view of the front and back of the clothes so our technical flats were accurate. The detail of the pattern wasn't important, it was more about the construction of the garment and the proportions. It was very fun drawing a variety of different clothes, from skirts to shirts, as every item was shaped and draped differently.


The item of clothing I really enjoyed drawing had to have been a denim jacket as it had a lot of detail compared to a pair of trousers. This took a lot more time too so focusing on all of the construction and lines was quite difficult at times!


Next lesson, we are exploring the Adobe software and looking at Illustrator, so having the experience of drawing by hand and using a computer to create these designs will help me decide which one i'm better at. Also, this task will help me out with my other unit i'm currently doing, digital fashion, as I am in the process of drawing garment designs for my project. 

Tuesday 4 October 2016

Creative Drawing - GIF making

'How do you make GIF's?' has been something i've always questioned when I see them on my Tumblr, Twitter and Pinterest newsfeed. Then, in Tuesday's workshop, this was what we did! I've finally been taught how to create them!! I was so excited to explore Photoshop and create layers to make one of these. Inspired by Hattie Stewart, I have created some GIF's like hers and I feel that her style and way of working is the same as mine.


How to make a GIF:
1) Background - find a magazine or an image you want to use that you want to turn into a GIF.
2) Layers - you need to create a variety of layers in order for the GIF to animate and flash.
3) Timeline - open up the 'timeline' window. Click 'create frame animation'. 
4) Speed - adjust the speed to what you prefer, but for mine, i've used 0.1 seconds.
 5) Timeline layers - use a new layer for each animation frame.
6) Loop - how many times do you want it to loop? I've set mine as 'forever'.
7) Saving - save your GIF by clicking on 'export', 'save for web (legacy).